


DIY Closet Shelves: Egger Laminated Chipboard + 3D-Printed Shelf Pins (5.8 mm) on a Prusa MK3S+
Disclaimer: all companies and brands mentioned below (Viyar, Egger, REHAU, Prusa, Tinkercad, Dnipro-M, etc.) are not sponsors.
Regional note: some of these are Ukrainian brands / Ukrainian suppliers (pricing, availability, and naming may be local).
I wanted better closet shelves for my 9-month-old’s clothes. Getting shelves cut from laminated chipboard is easy, but shelf hardware is where small annoyances start: wrong size, store trips, shipping, and then it still doesn’t fit perfectly.
So I did it the “engineer at home” way: chipboard shelves via a cutting service, and shelf pins (shelf pegs) 3D-printed at home. Fast, minimal hassle, and the whole thing came out at about ~900 UAH.
Photos: order + manager response


What I did
- 3D-printed shelf pins (shelf pegs) in PLA, ~5.8 mm
- Ordered custom chipboard cutting (and edgebanding) from a Ukrainian supplier
- Drilled holes in the closet niche (I’m not a pro woodworker — just careful)
- Assembled shelves for light loads (kids’ clothing)
3D-printed shelf pins: model, material, fit
I modeled a super simple part (basically a small cylinder pin) in Tinkercad.
- Tinkercad screenshot:
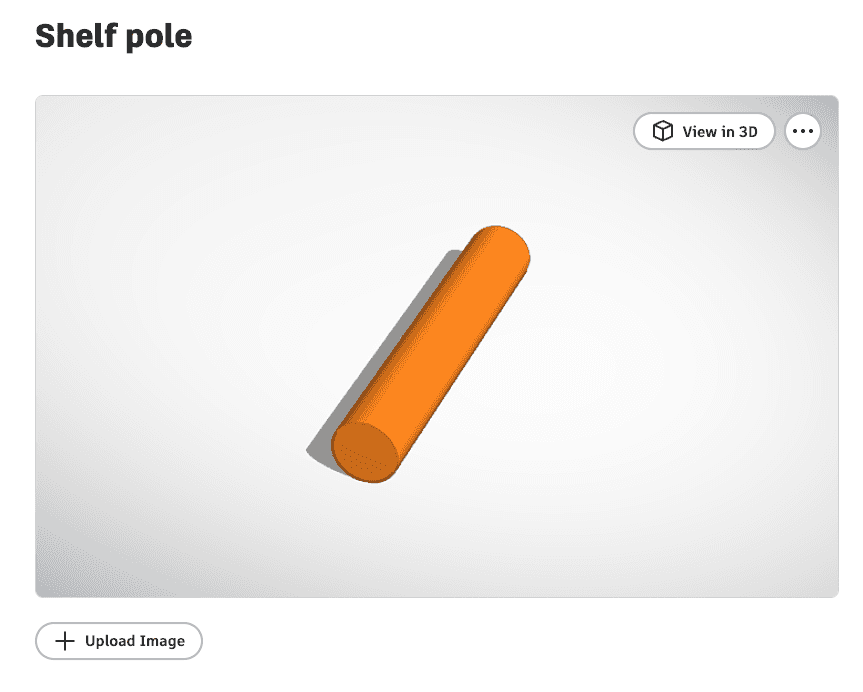
- Project: https://www.tinkercad.com/things/6tVoel3IrcA-shelf-pole
- Printer: Prusa MK3S+
- Material: PLA
- Pin diameter: ~5.8 mm
- Hole size: 5.5 mm
Why 5.8 mm in a 5.5 mm hole?
That’s an interference fit: I wanted the pin to hold firmly without glue and without wobble.
Important: “how tight” this fit is depends on:
- printer calibration (real outer diameter),
- PLA behavior,
- drill bit accuracy + the material you drill into.
Practical tip: print one test pin first and try it in one hole before doing everything at scale.
Ordering the shelves: laminated chipboard cutting + edgebanding
My shelf size was 586 × 487 mm, 3 pieces.
Specs I used (for reference):
- Laminated chipboard: Egger U961 Black Graphite ST7, 18 mm
- Edgebanding: only the front edge (586 mm) per shelf
- Edge band: ABS 23×1 mm, black graphite, REHAU (matte)
- Pickup: self pickup
What I liked: they replied with a quote the same day by email — genuinely fast.
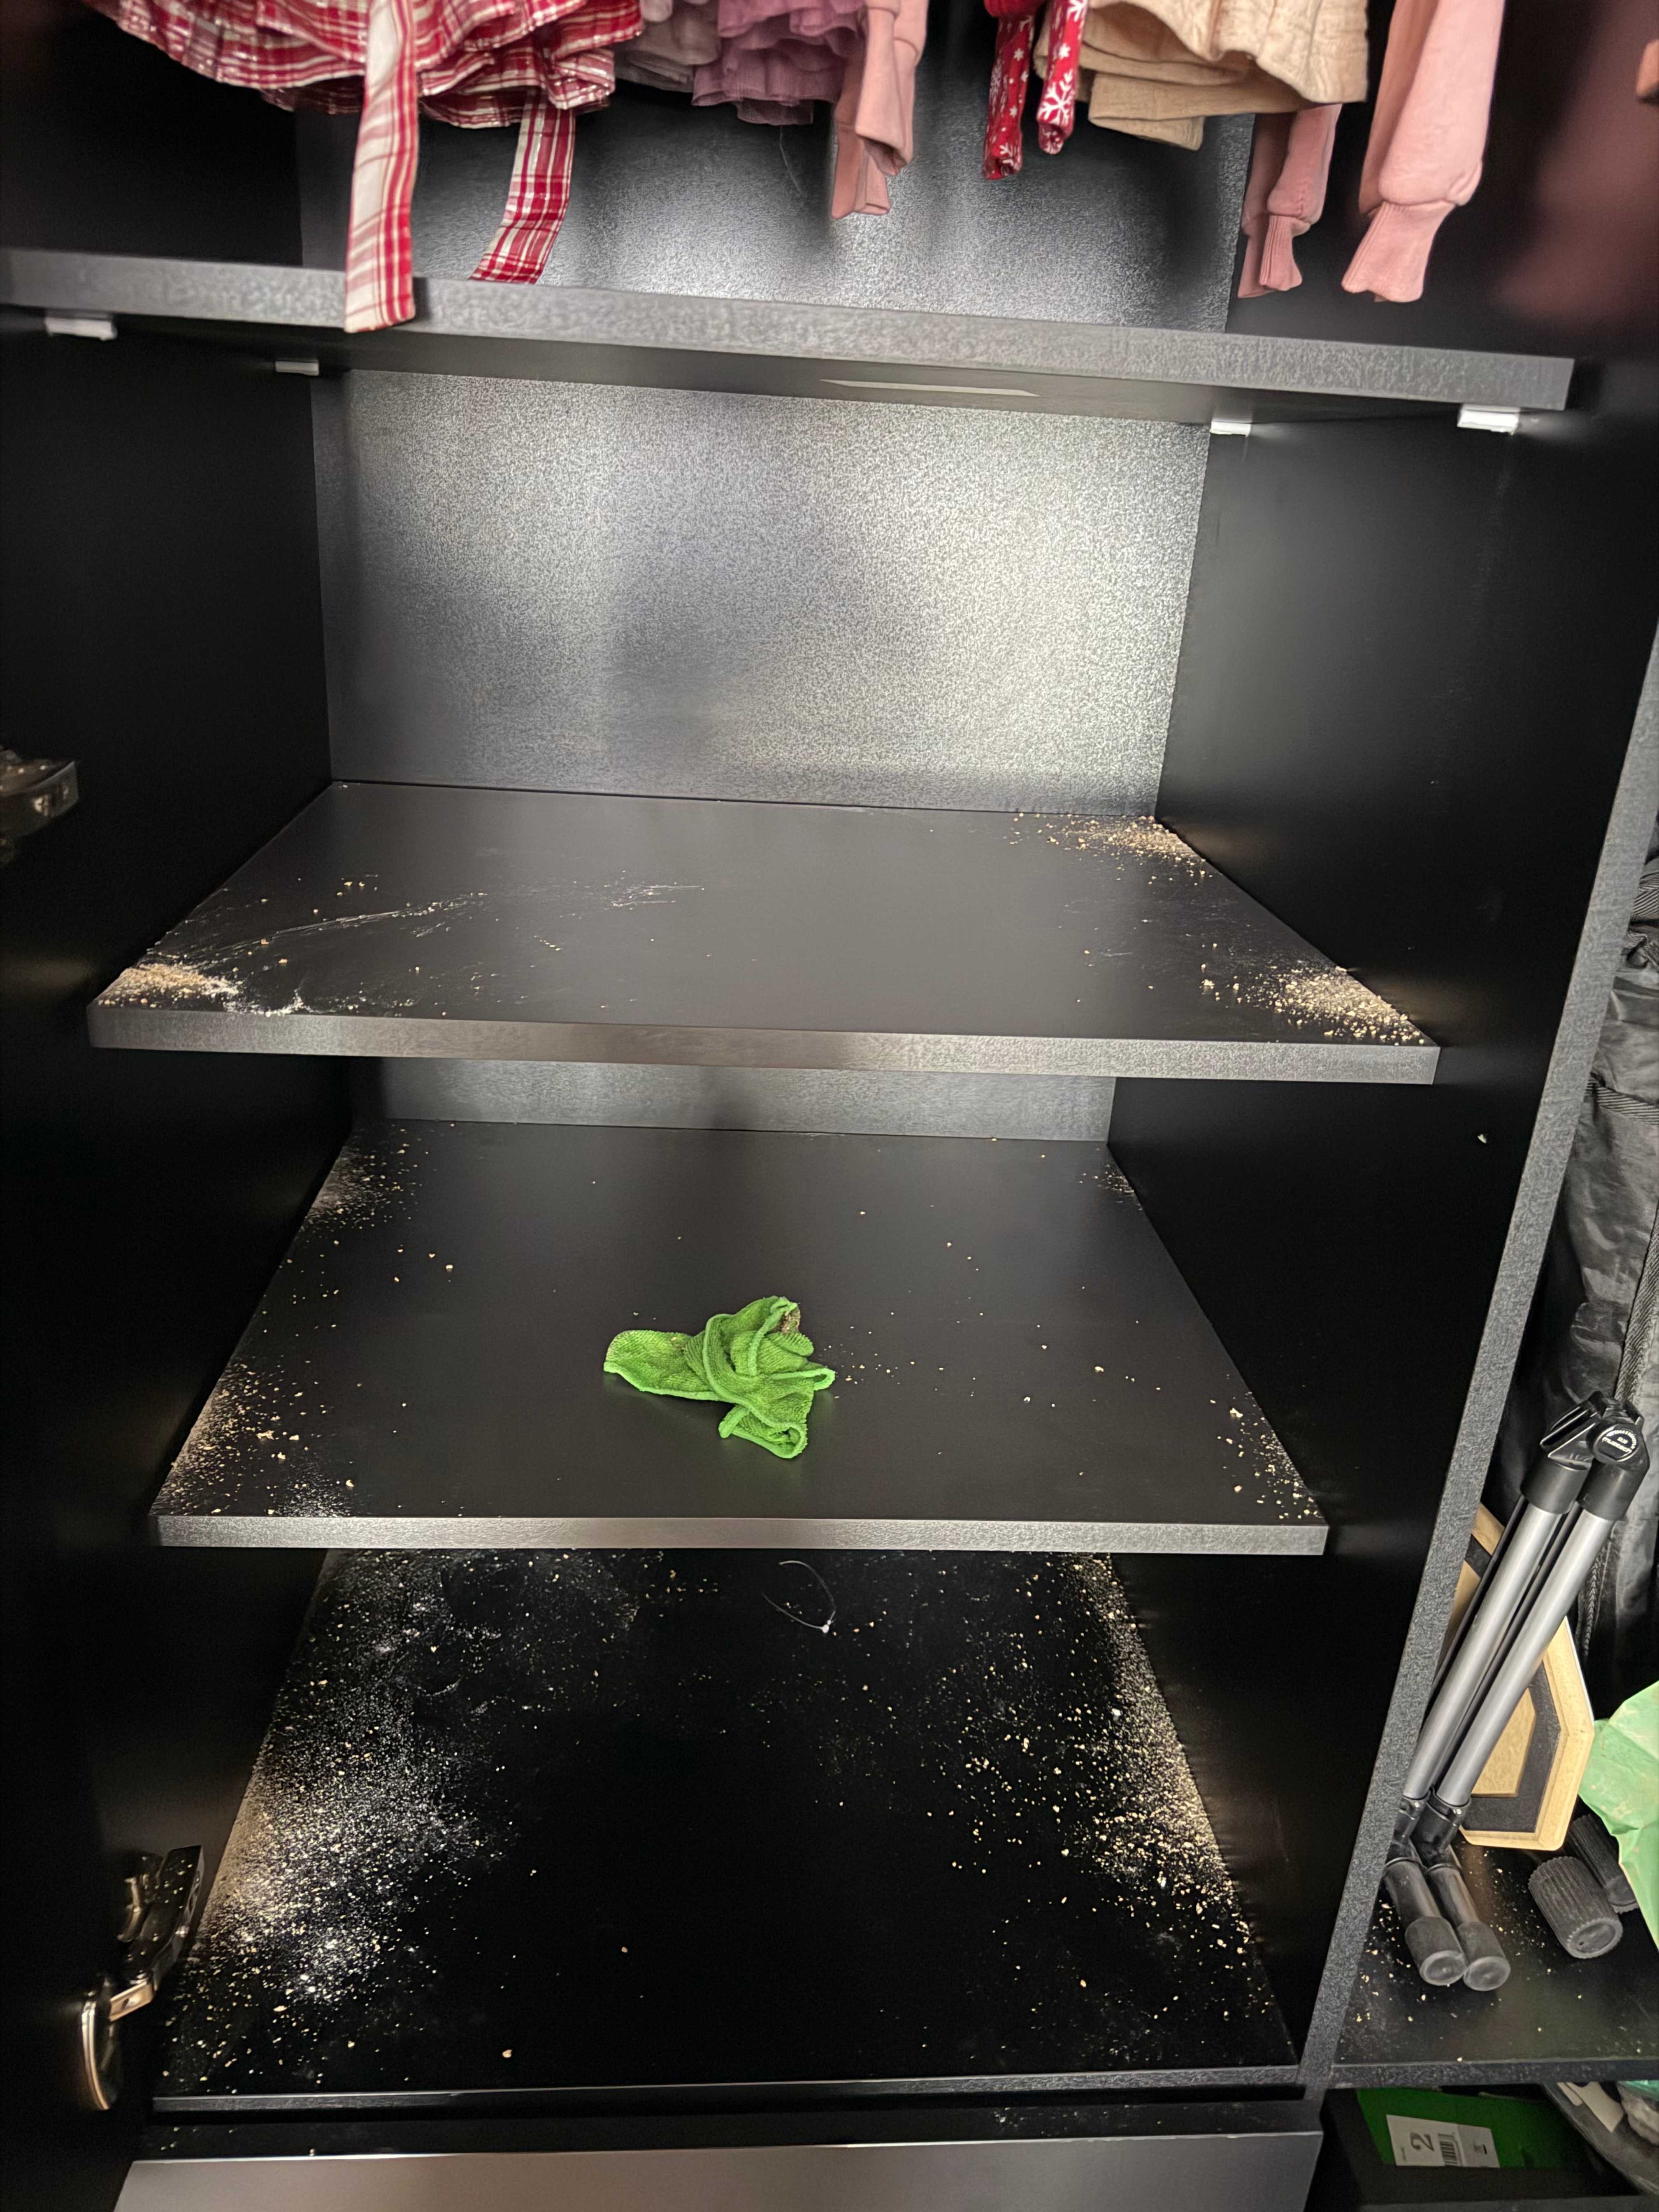
Drilling holes in the niche (I’m not a pro)
I kept it simple:
- Marked the shelf height.
- Marked 4 pin locations (2 per side).
- Drilled with a 5.5 mm bit.
What I’d improve next time:
- Make a basic drilling jig/template (even a scrap strip) so all holes line up perfectly.
- Add a depth stop (tape on the bit works) to avoid going deeper than needed.
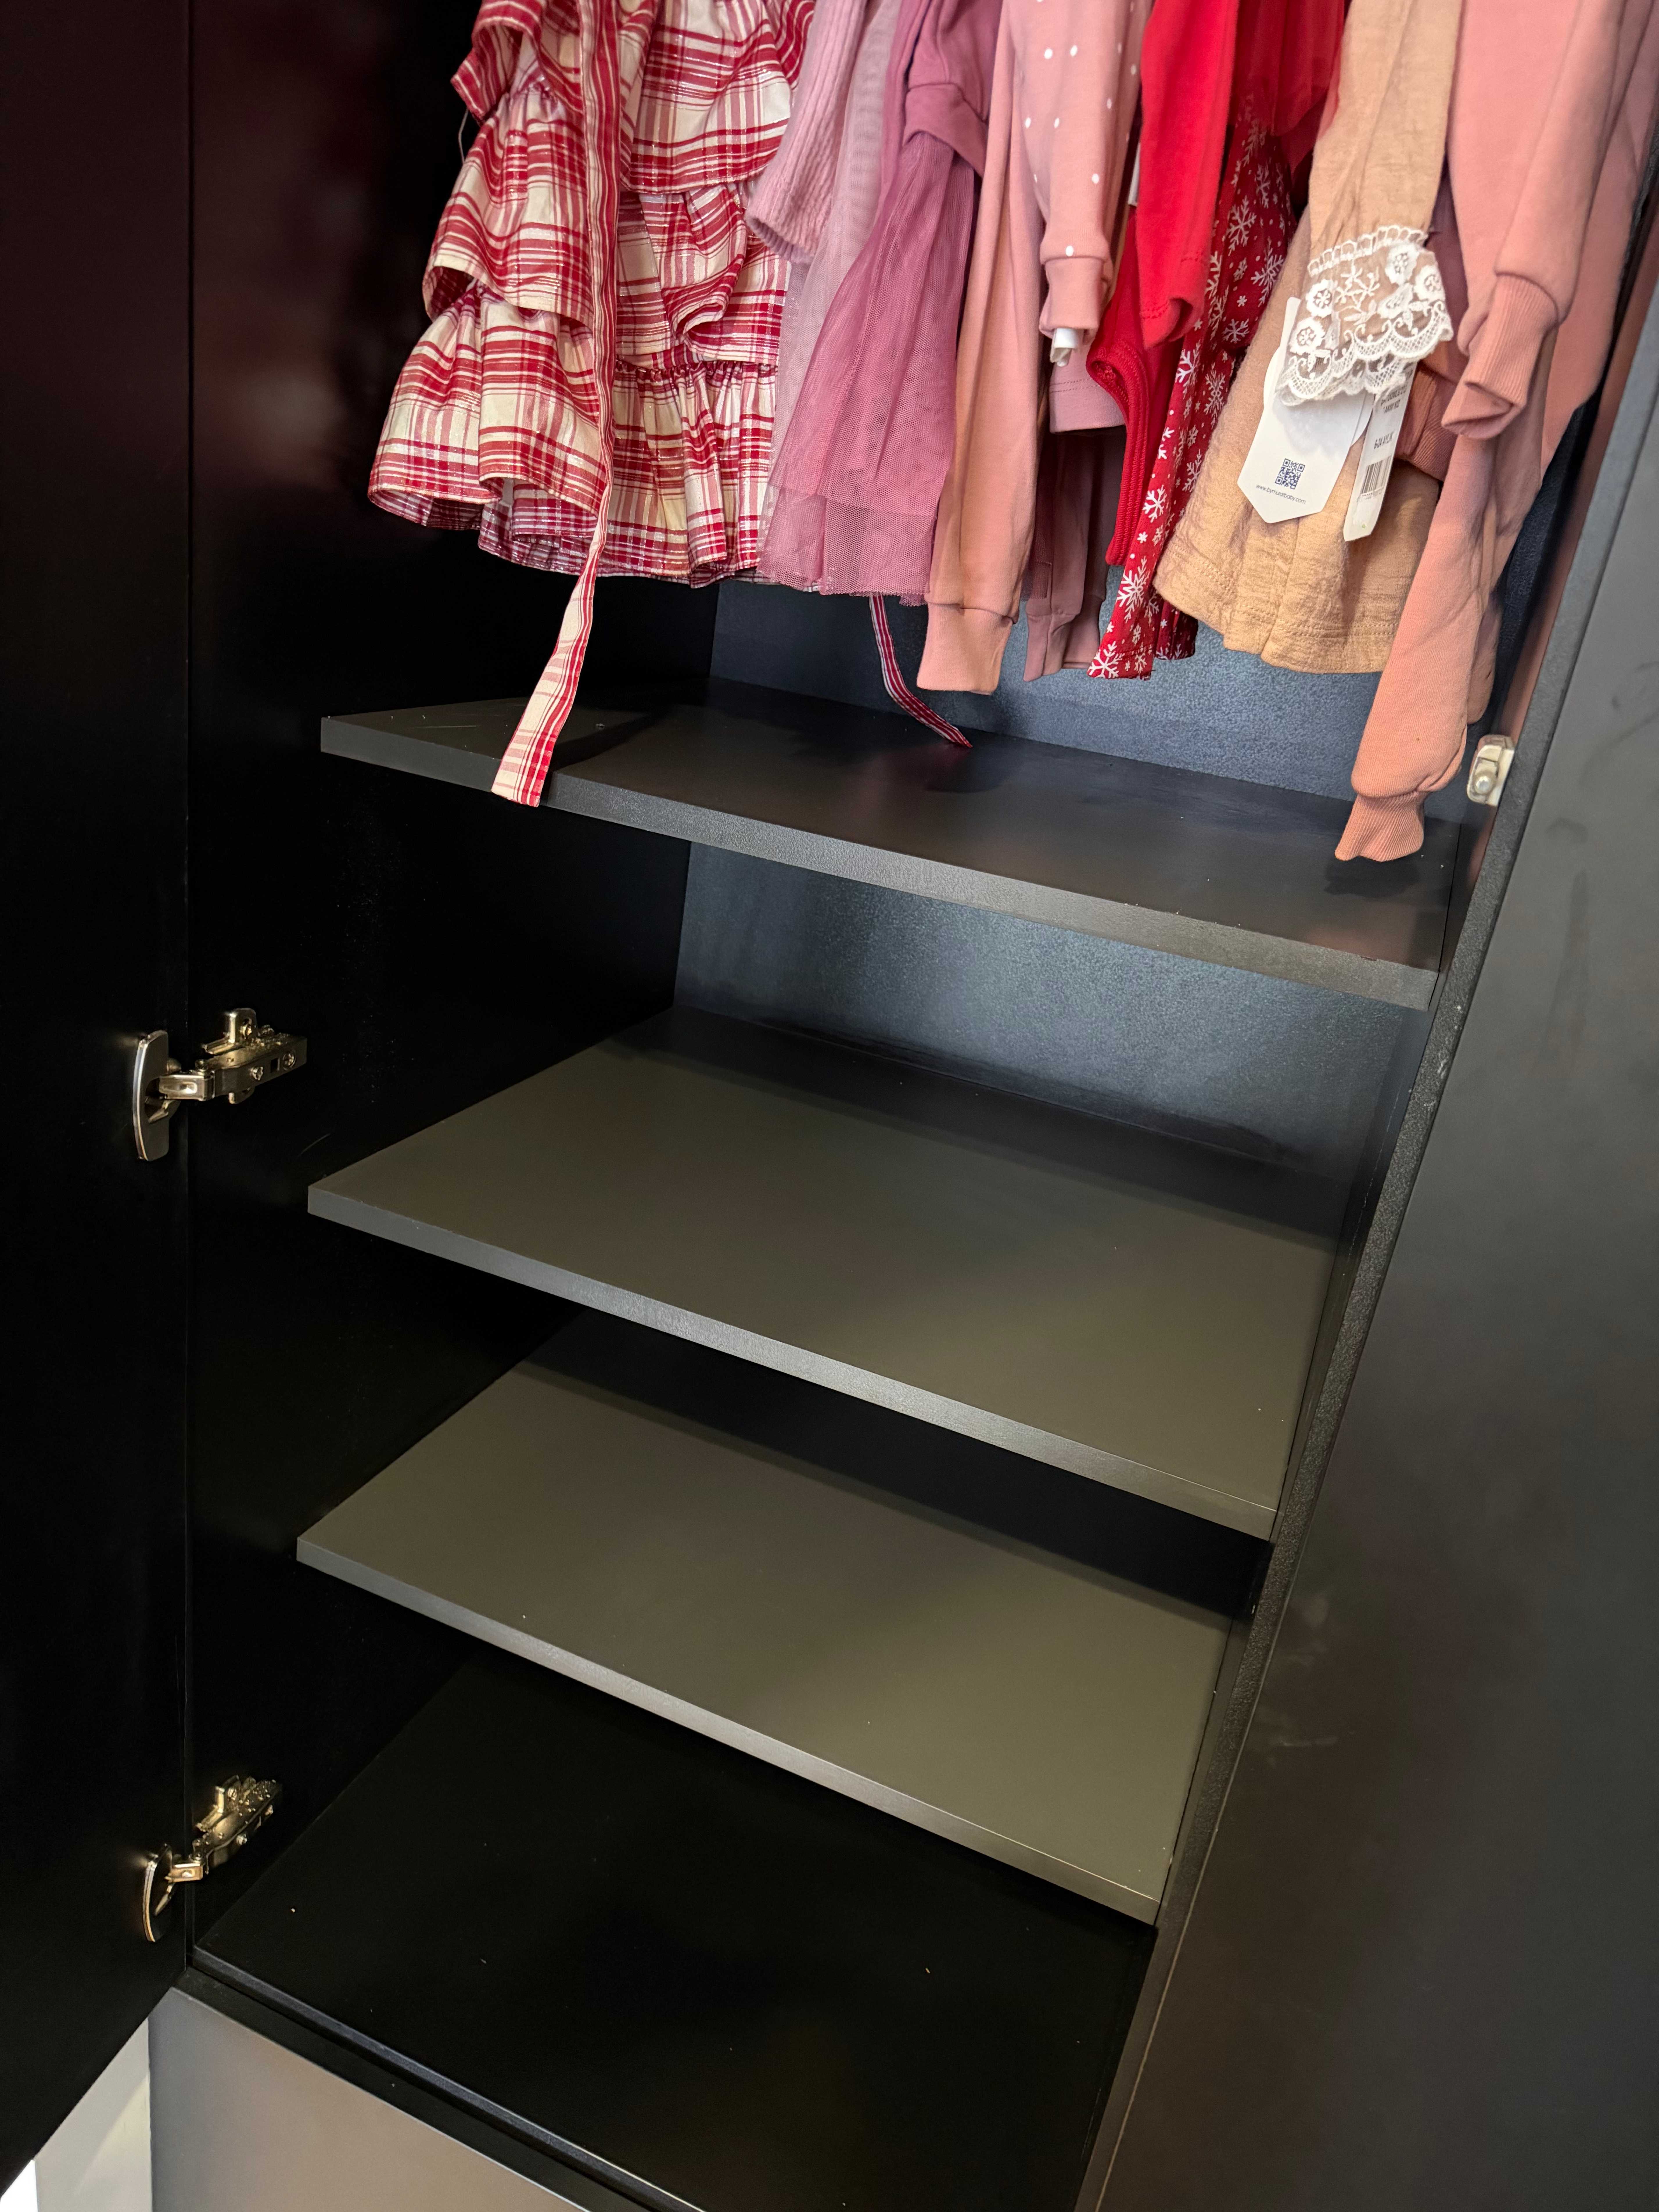
Installing the shelves
No magic:
- insert pins,
- place the shelf board,
- check for level + wobble.
Since this is for kids’ clothes, the load is light, and PLA pins are totally fine here. For heavy loads (books/tools), I’d use metal pins or redesign the support geometry/material.
Result (installed shelves)
And here’s how it looked right after drilling (dust included — real DIY):
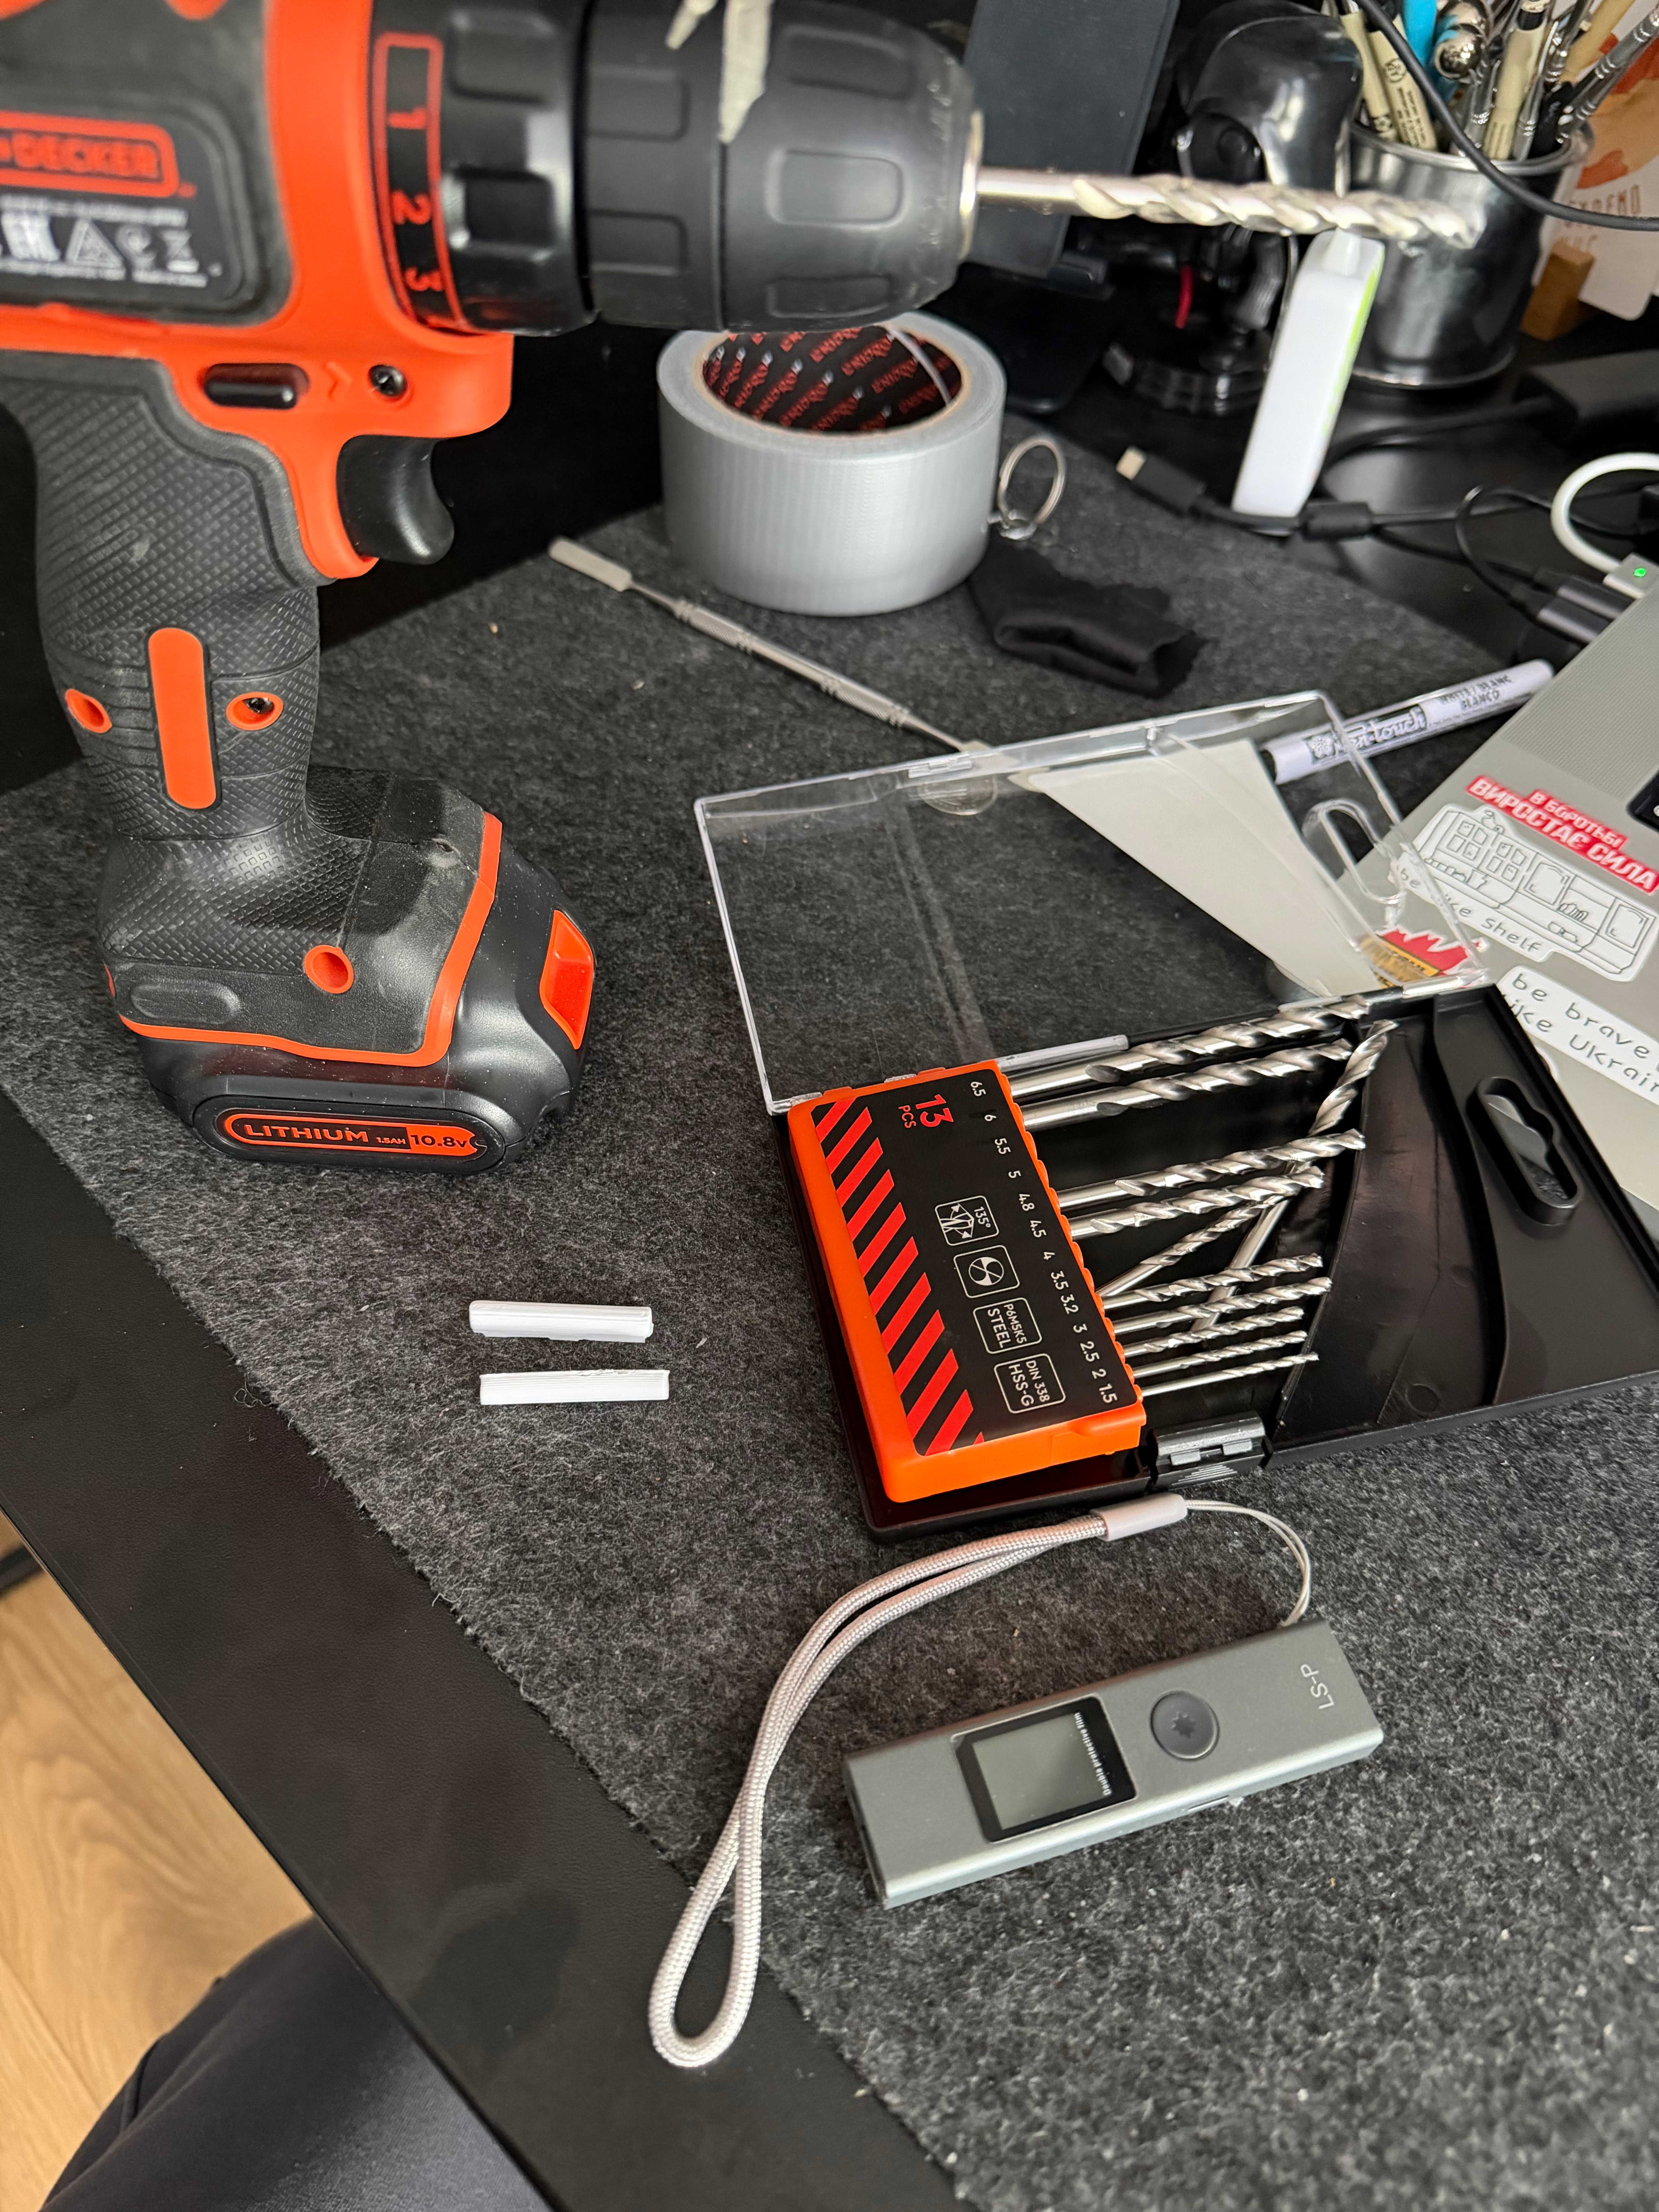
Tools & process
Cost
Total: about ~900 UAH (chipboard + cutting/edgebanding + small bits).
Yes, I could have bought shelf pins. But in practice:
- Tinkercad + Prusa MK3S+ + ~1 hour = parts in hand
- no trips, no shipping, and a perfect size for my niche
FAQ
Will PLA shelf pins hold up?
For light loads like clothes — yes. For heavy stuff, use metal pins or rethink the design.
What pin diameter should I print?
Start with a test. My setup worked as ~5.8 mm pin in a 5.5 mm hole, but your printer/material/drill accuracy may differ.
What should I use to drill the holes?
I used a drill/driver and a 5.5 mm bit. The biggest win is careful marking; a simple jig makes it almost foolproof.
P.S. (optional)
If you also 3D-print small practical parts at home, I occasionally post short DIY notes like this in my blog.