
Creating Multi-Color 3D Prints: From Tinkercad to PrusaSlicer
This guide will walk you through the process of creating a multi-color 3D print by modifying an existing model using Tinkercad and preparing it for printing with PrusaSlicer.
1. Choose Your Model
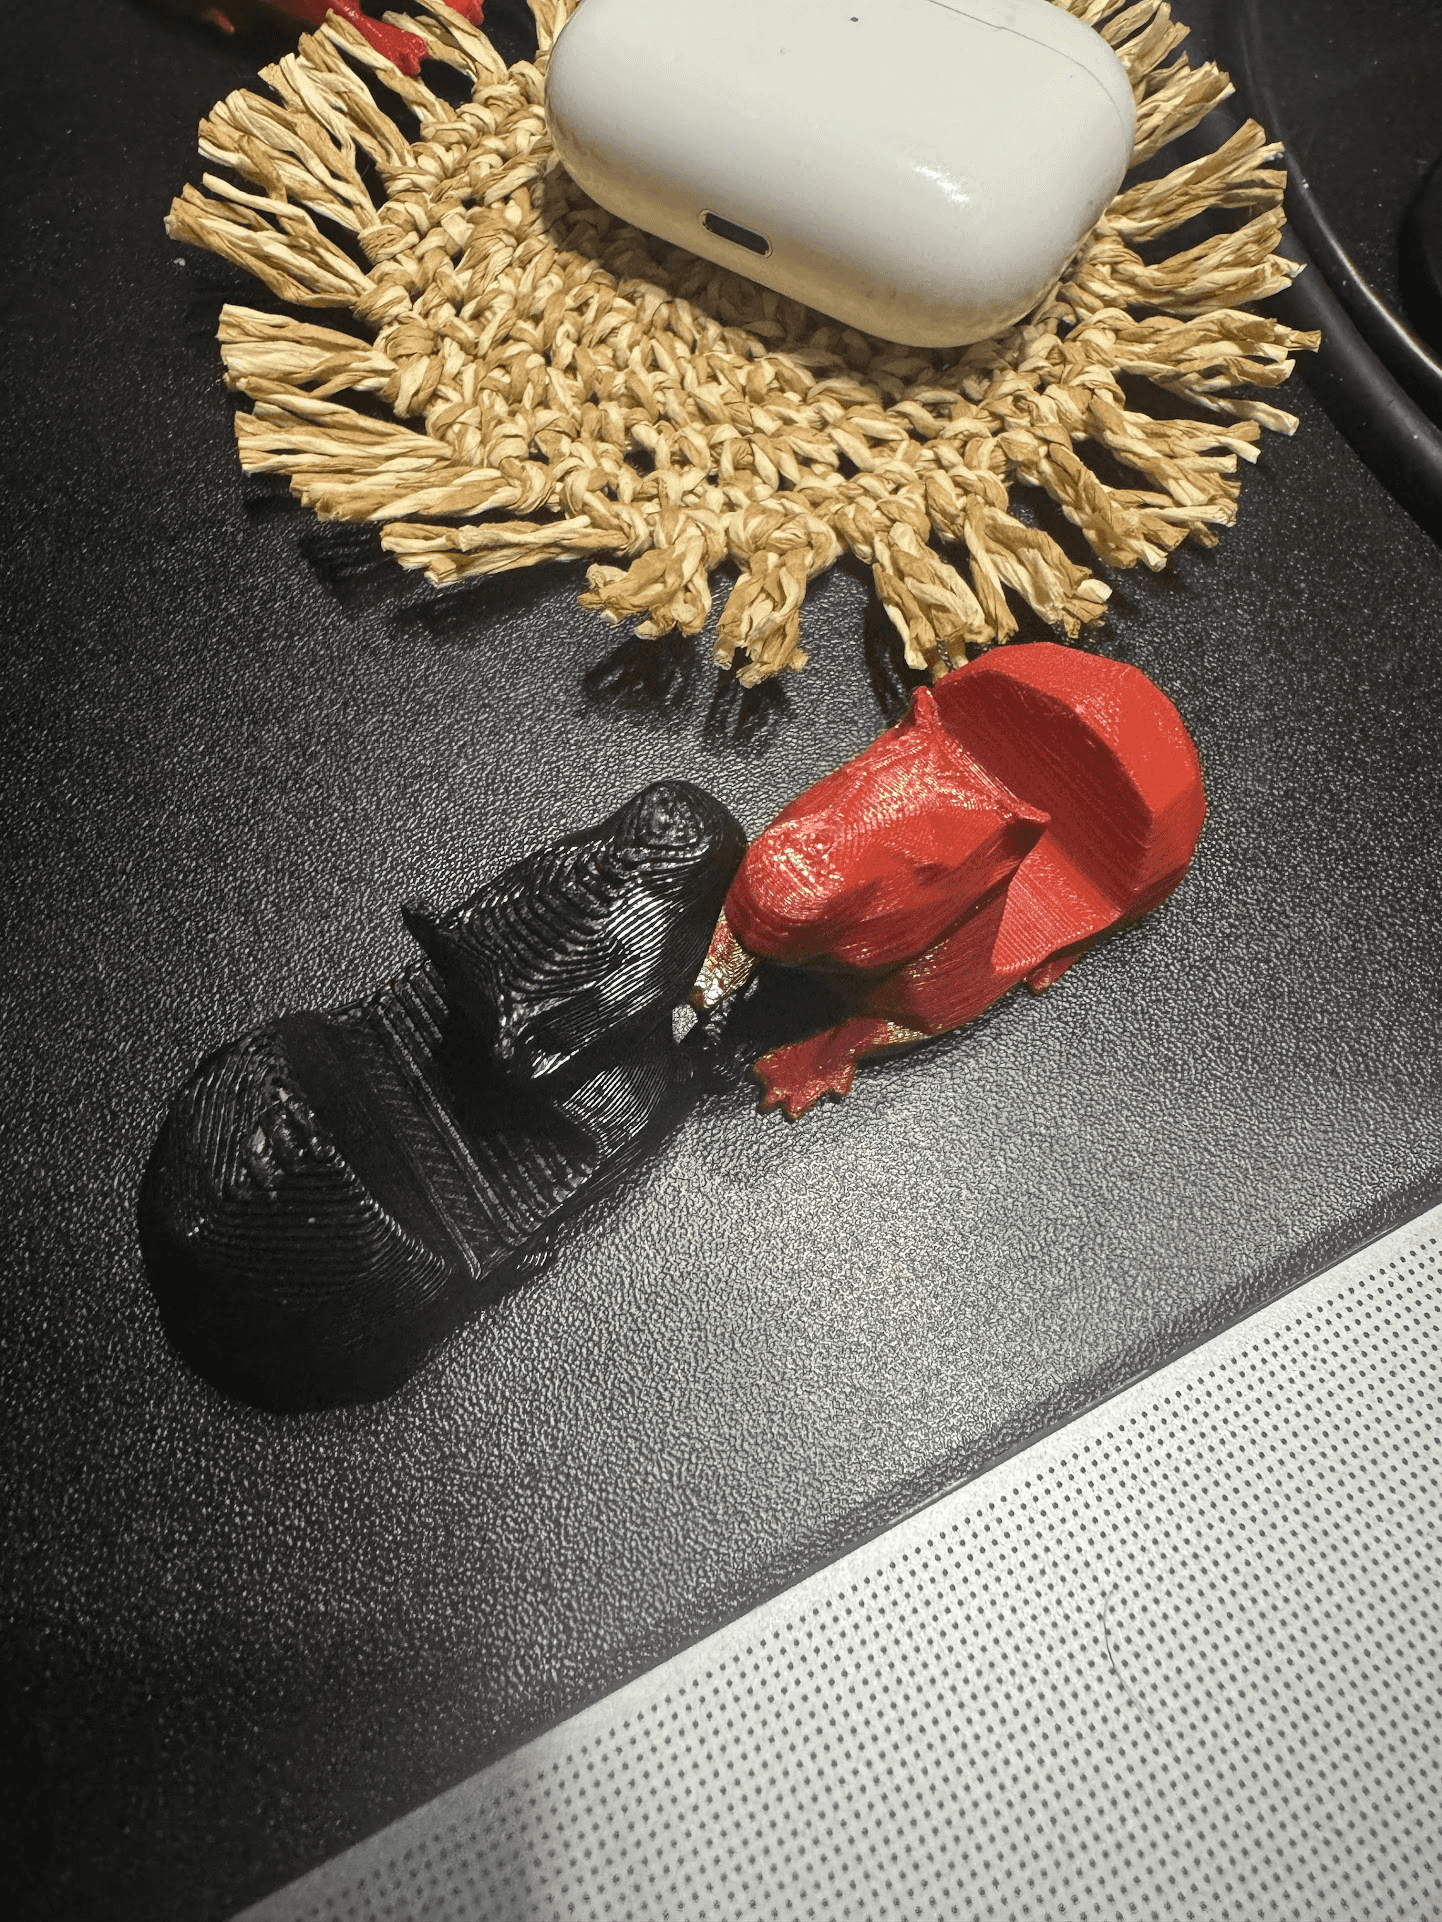
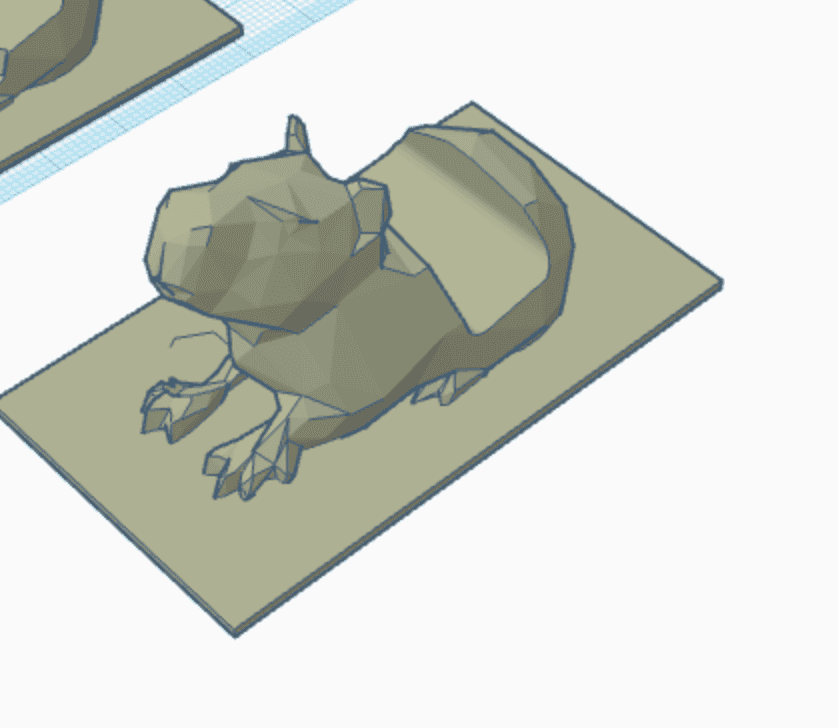
For this tutorial, we'll use the popular Capybara Phone Holder model from Printables: https://www.printables.com/model/550754-capybara-phone-holder-keyring
2. Modify the Model in Tinkercad
2.1 Import and Prepare the Model
- Sign in to Tinkercad and create a new design.
- Import the Capybara STL file into your workspace.
- Create two copies of the Capybara model.
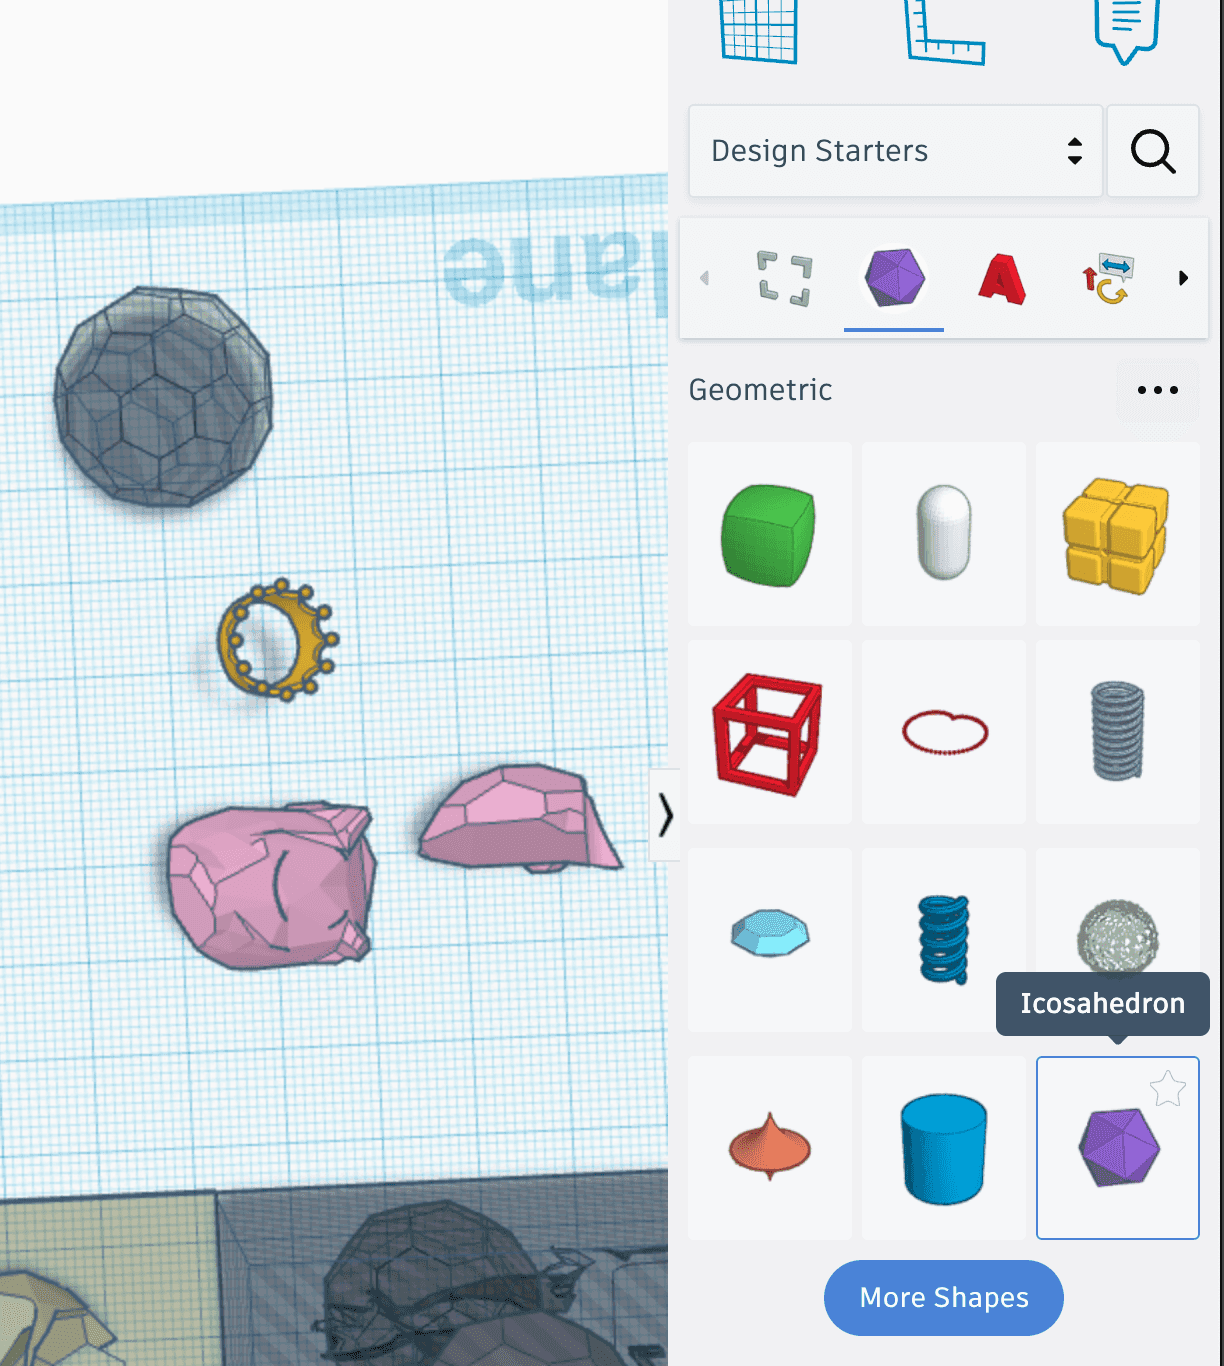
- Add two Truncated Icosahedron shapes to your workspace.
2.2 Create Holes and Solid Parts
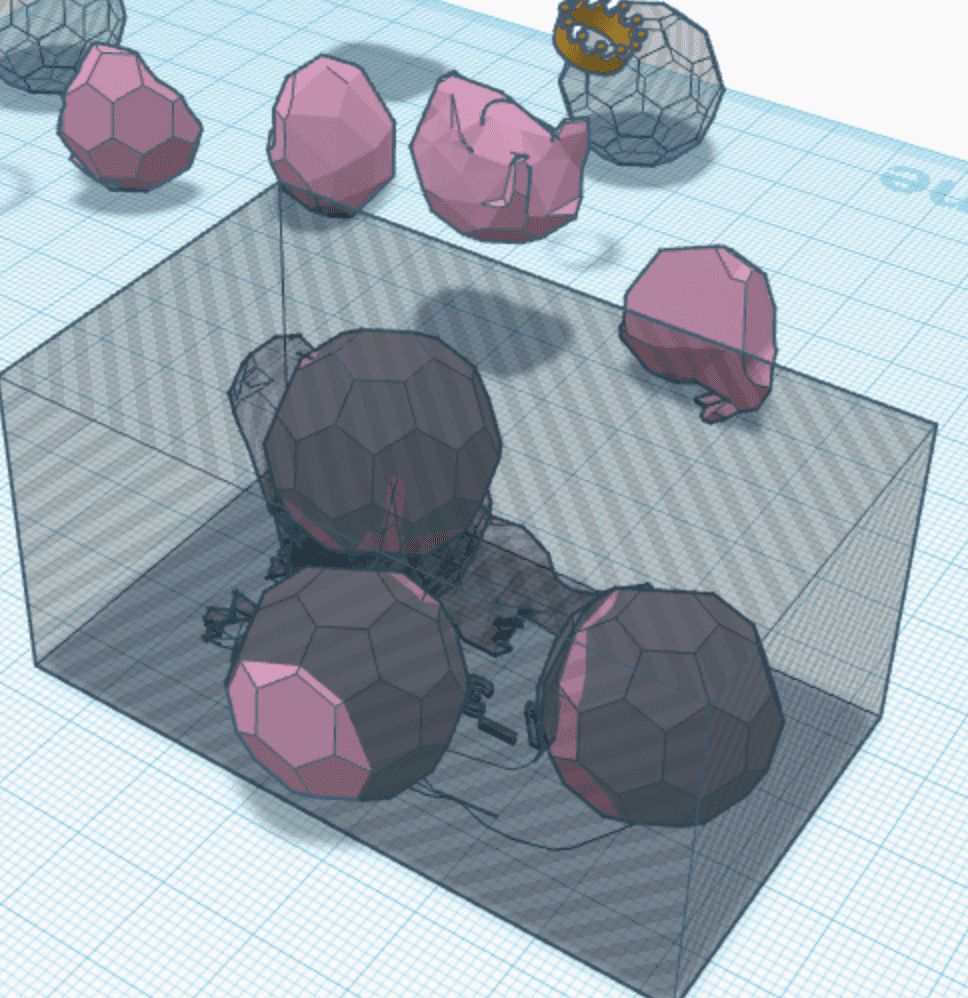
- Select one Capybara model and one Icosahedron.
- Change these to "Hole" in the Shape menu.
- Keep the other Capybara and Icosahedron as solid objects.
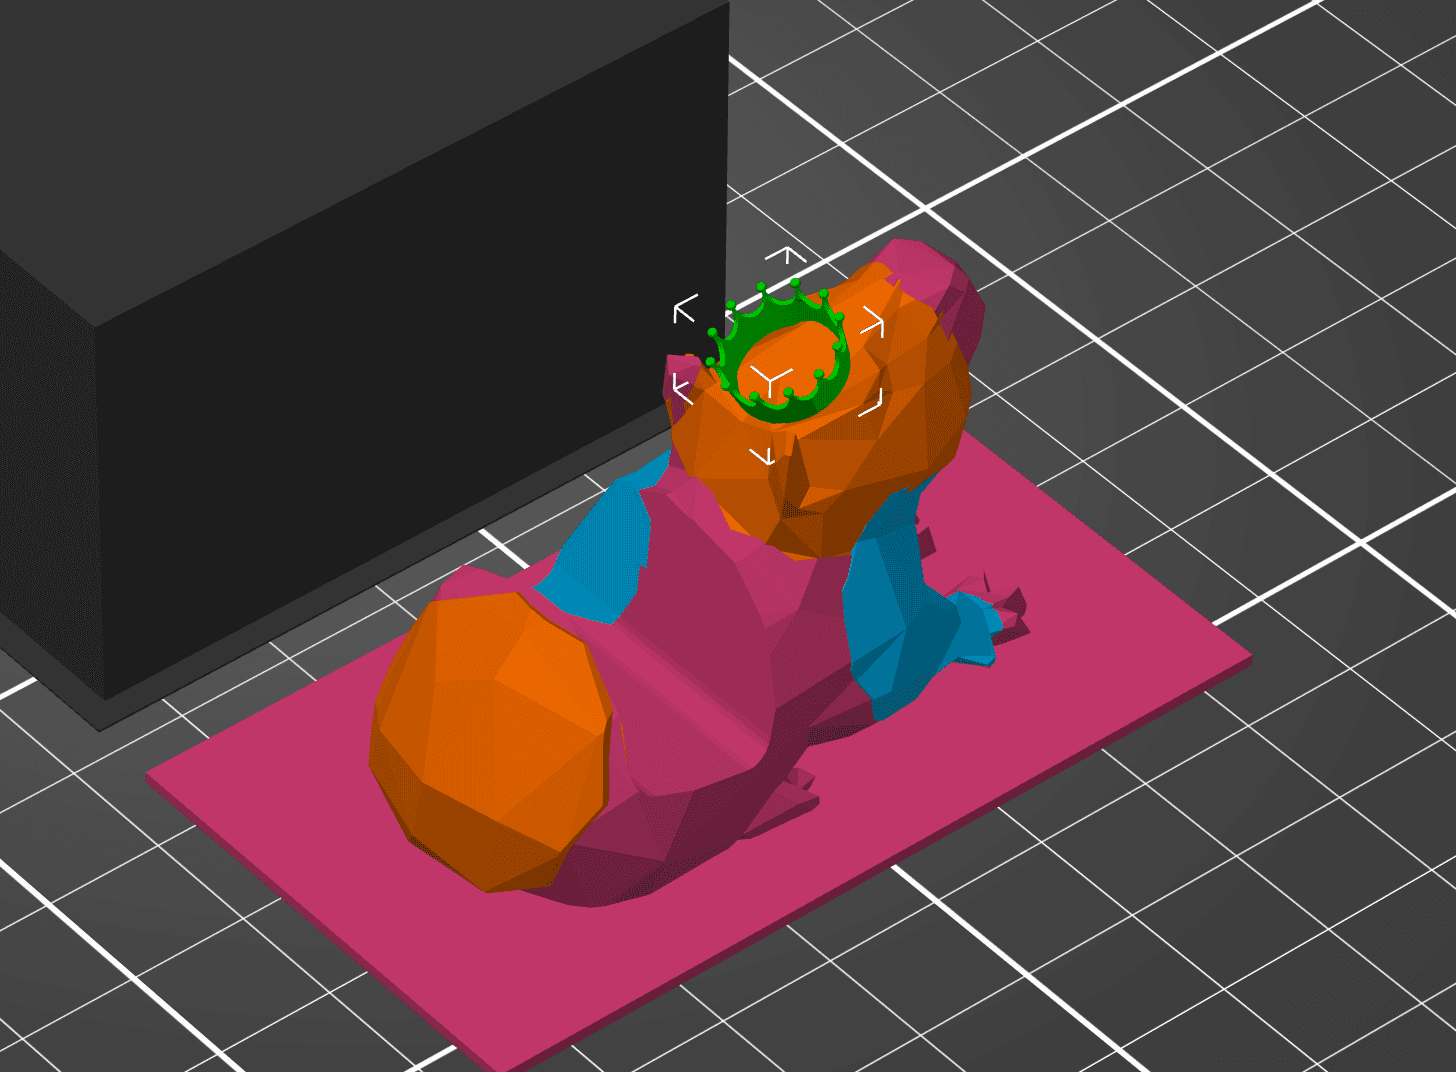
2.3 Position and Cut
- Place the "Hole" Icosahedron inside the solid Capybara where you want to create a cut-out.
- Group these together to create the main body with a cut-out.
- Position the solid Icosahedron inside the "Hole" Capybara.
- Group these to create the insert piece that will fit into the main body.
2.4 Create Multiple Partitions
- Repeat this process to create several cut-out sections in your Capybara model.
- Ensure each cut-out has a corresponding solid piece that fits perfectly.
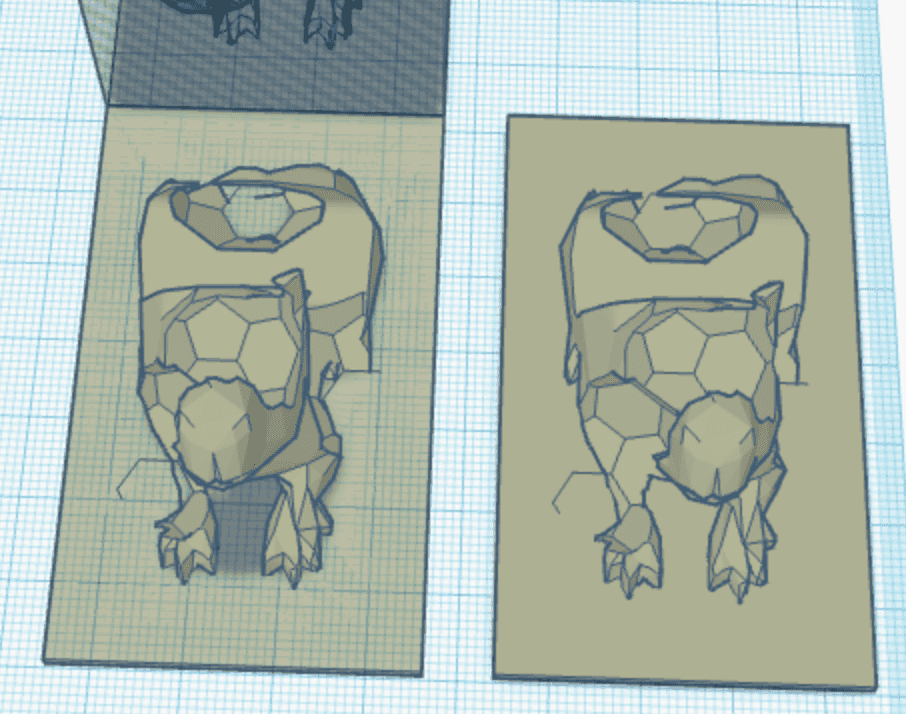
2.5 Export Your Parts
- Ungroup all your creations so each part is separate.
- Export each part as an individual STL file.
3. Prepare for Printing in PrusaSlicer
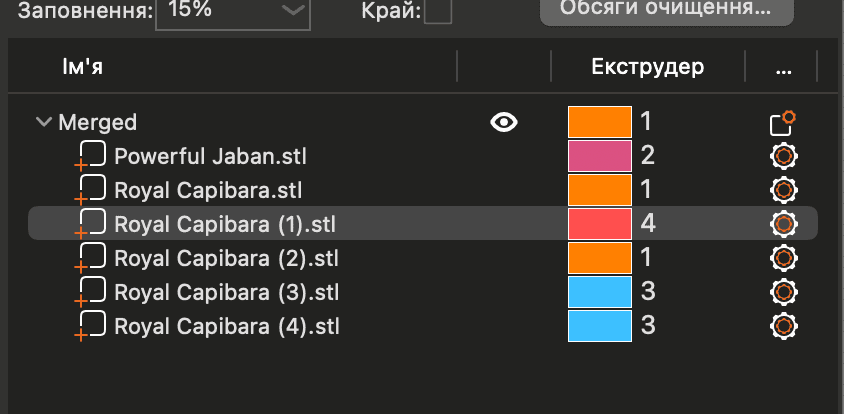
3.1 Import Parts
- Open PrusaSlicer and start a new project.
- Import all your STL files from Tinkercad.
3.2 Position Parts
- Arrange the parts so they fit together as they would in the final model.
- Use PrusaSlicer's move, rotate, and place on face tools to position everything correctly.
3.3 Assign Colors/Materials
- Right-click on each part and select "Change Extruder" to assign different colors or materials.
- Typically, assign one color/material to the main body and another to the insert pieces.
3.4 Slice and Preview
- Click on "Slice now" to see how your multi-color print will look.
- Use the layer preview to ensure colors are assigned correctly throughout the model.
3.5 Adjust Settings and Print
- Adjust your print settings as needed for multi-material printing.
- When you're satisfied, export the G-code and send it to your printer.
Conclusion
By following these steps, you can transform a single-color 3D model into an exciting multi-color print. This technique allows for creative customization of existing models and opens up new possibilities in 3D printing design.
Remember to experiment with different shapes for cutting and various color combinations to achieve unique and interesting results!